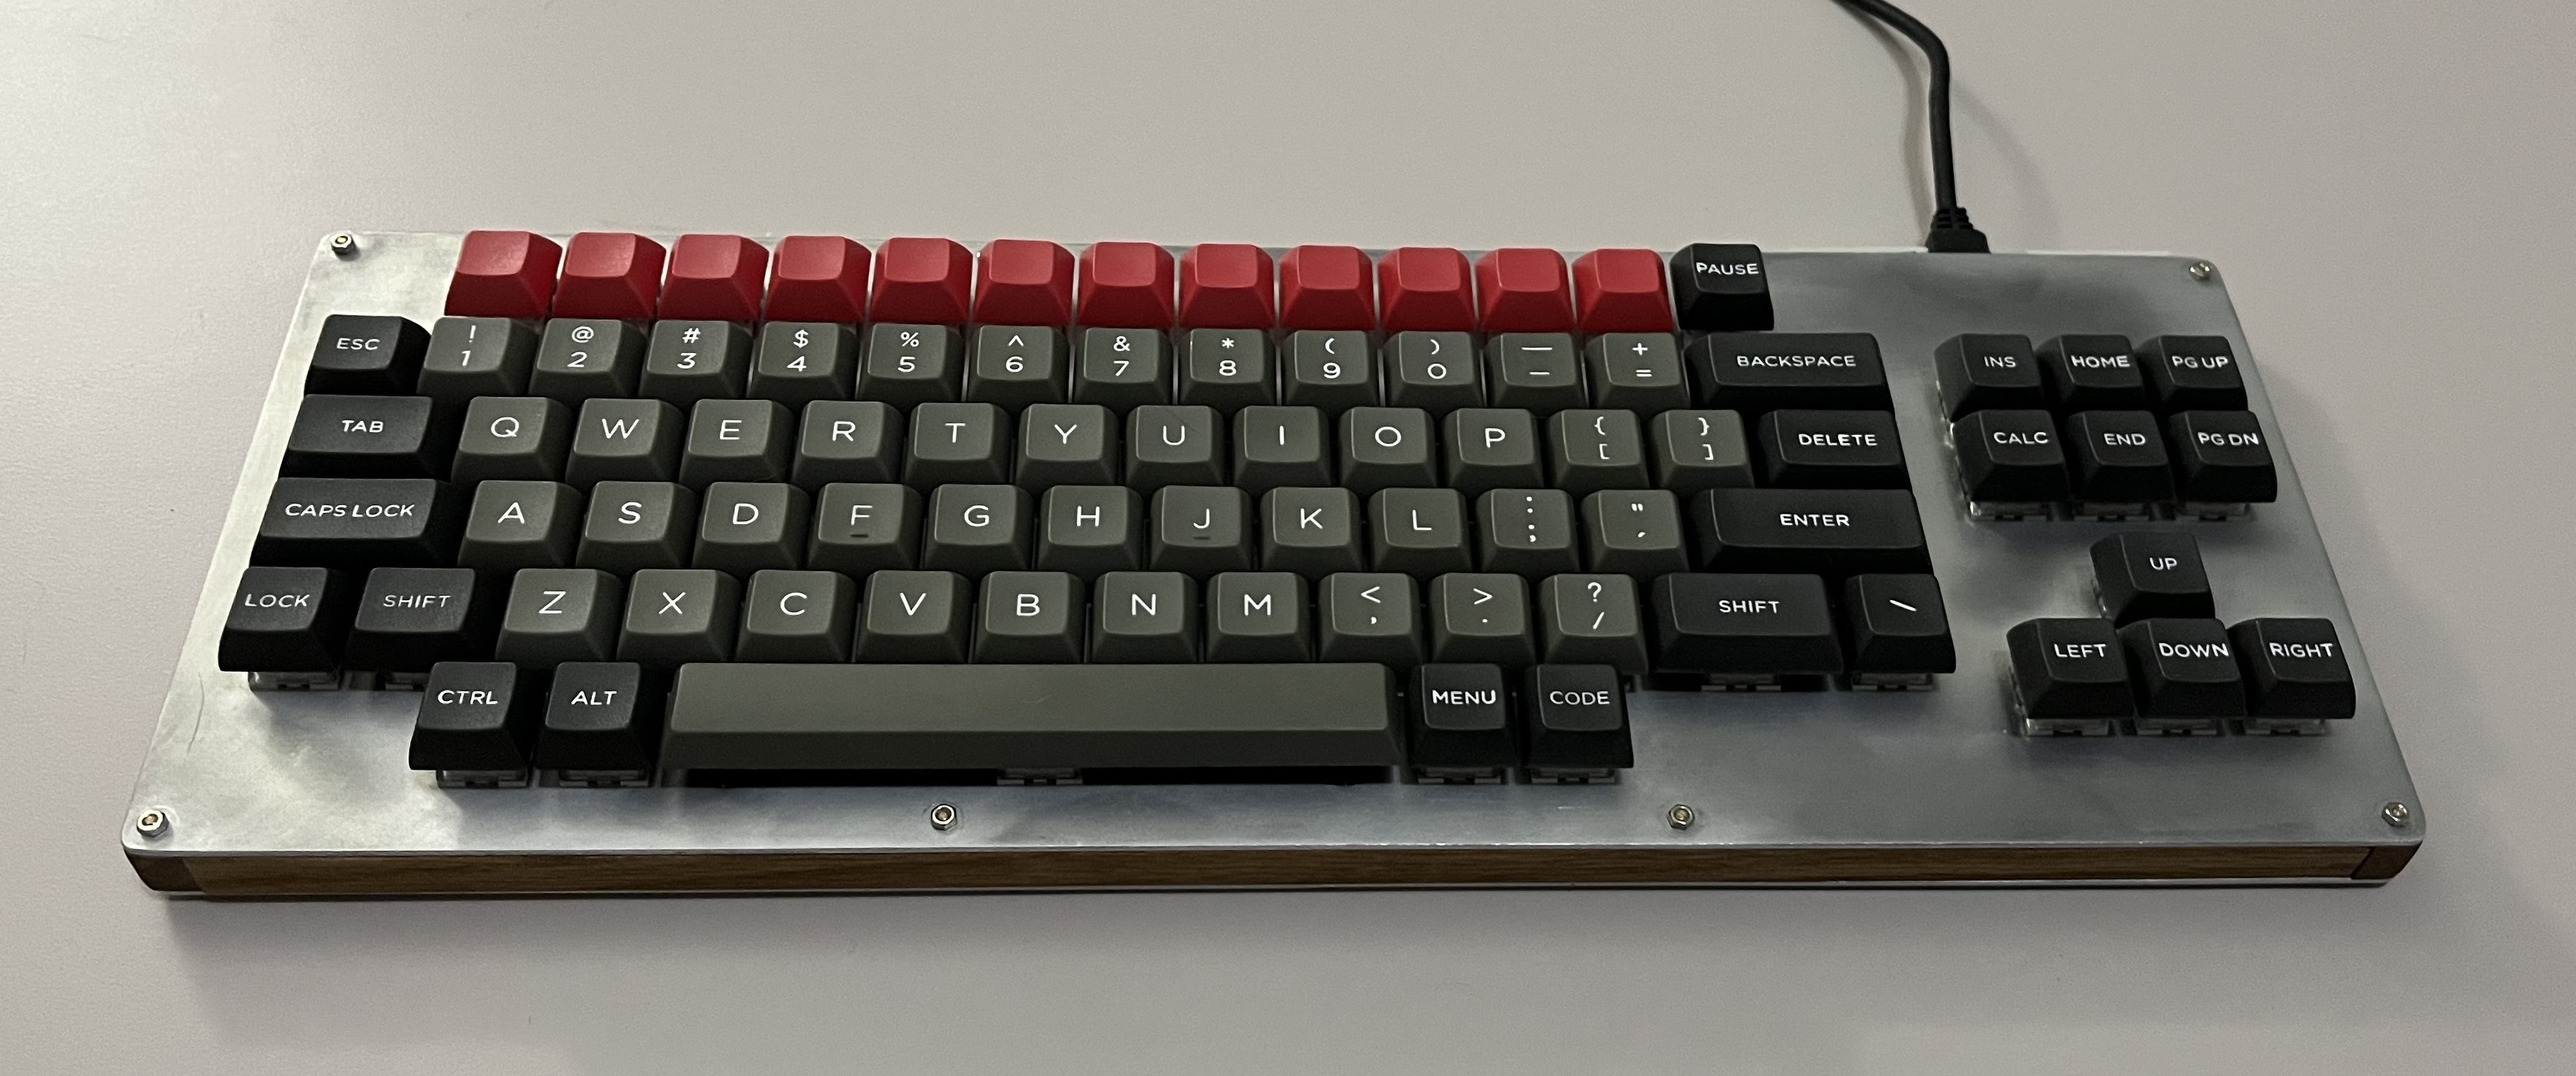

There are some fit and finish issues, but they’ll require a full teardown to remedy, so I’m inclined to call this one done (for now). It might eventually get some little siblings, since it was barely any more expensive to have 3 plates cut versus 1.
Layout: Modified TKL with elements taken from HHKB (and therefore vintage Mac), BBC Micro, and (sort of) MSX and (if you squint) Amiga.
Guts: Handwired, connected to an RP2040 running KMK.
Keycaps: Main are “VSA” overstock from Aliexpress. Function keys are blank DSA, also from AE.
Switches: Kailh Box Navy.
Materials: lasercut aluminum and poorly cut red oak (not my best woodworking TBH, but sanding and oiling forgives a lot).
Super nice! I really like the layout design and the overall metal and wood look!
Thanks. Been using it for my home and gaming PC (gaming has been exclusively Minecraft with my daughter in that time) for about a week, and no major issues. It is just about the look I was going for, kind of a vague “out of time” vibe without trying to do something crazy like actually live with a C64 layout. Even with this one, the “reverse ISO” left shift that I did as a nod to older computers that had a 1U to the left of the LShift was probably a slight mistake, but I’ve just remapped it so they’re both shift.
You nailed it, I think!
I feel you on the right Shift! It’s optional on the TEX Shura which I’ve used recently, and I of course went for the u1, too. I’m surprised how often I reach that far with my pinky! But it looks nice :D
PS. for some nice out-of-time keyboard and computer shots, I can recommend the show Loki. They have so sparked my desire to find a 4:3 display and build an softly curved, keyboard and display-integrated pc case with an orange epoxy resin lacquer finish. How one can dream.
That’s really cool. Got any pictures of the inside wiring?
Also can I ask how much the laser cut plate cost? I was thinking of doing this but then found pretty cheap pre-made plates.
There are a few in-progress pics on Geekhack, but here is the final wiring. The RP2040-Zero has 20 castellated GPIO pins, and I ended up with a weird looking but doable 12x7 matrix. Next time I crack this one open, I think I will solder in a second LED to the last open pin and tie it to Capslock. I do find I miss that one a bit.
The plates were from Xometry. I got 3 switch plates and 3 bottom plates made of 1/16" (1.6mm) 5052 aluminum. The only finish option I chose was deburring. Total was US $67, and with the options I chose (and more to the point, the options I declined), I think this is probably about as cheap as it gets; the setup is a huge part of the cost, so I think 1 of each plate was going to be like $44. This first build, I just went right to town putting switches in and starting with the wiring. I justified my impatience by telling myself I want to see how it ages, but mostly I wanted to dive in. For the other two, I think I’ll sand and put a clearcoat on before beginning the wiring, and I will refine the case sides one way or another, maybe lasercut plywood, maybe 3D printed, or maybe just spending more time on the woodworking.
Awesome. Thanks.
Nice work and thanks for posting! You reminded me I needed to diagnose an issue with my handwire and within minutes I’d found and fixed a bad joint…
Handwires are finicky, but the easy repair seems like it will make things easier to live with. I am sure there are several cold joints in this one (I really am still not very good with the iron), but I caught several structurally problematic ones during the build, and since then nothing has come loose. I kept things vertically compact enough that 3/8"/10mm seems enough to avoid any issues with shorts, but I could probably use a roll of kapton tape.
Yeah in my build I have a short length of micro USB cable with a usb connector on one end and a 4 pin socket on the other that attaches to a usb breakout board mounted on the edge of the bottom plate. This let me place the usb port in a comfortable location while putting the teensy in a logical place in the case.
Anyway, one of the joints connecting the cable to the 4 pin socket broke. Super easy fix. Other than that it’s been remarkably problem free, and as you say, even if I run into issues into the future, repairs are very easy (unless I ever have to replace the controller… that could be more of a pita).